Stools by Stuart
Every stool has a story.
"To practice any art, no matter how well or badly, is a way to make your soul grow. So do it!"; Kurt Vonnegut.
Stool #11: Maple Cutting Board Stool (with Black Walnut accents)
Chet is a good friend of mine. We grew up in the same area at different times -- a few years apart -- and we know a lot of the same stories about the place.
He owns a block of storage units which occasionally need cleaning out due to non-payment for whatever reason. This usually means getting a large dumpster and loading it up with many years worth of trash. Sometimes he asks me to help, and come see if I want anything. A few months ago there was an old cutting board made from Maple wood that I couldn't resist. It had some holes drilled in one side but there was still a fairly big piece that was too nice to toss out.
After a few months of moving this around in my shop, I got tired of it and decided to try making a stool top from the good section. I was able to scroung some pieces of Maple for the legs but they were too thin to make the taper. I glued three sandwitchs of three maple pieces together with Black Walnut strips between. Then I ripped a diagonal which yielded two legs for each sandwitch.
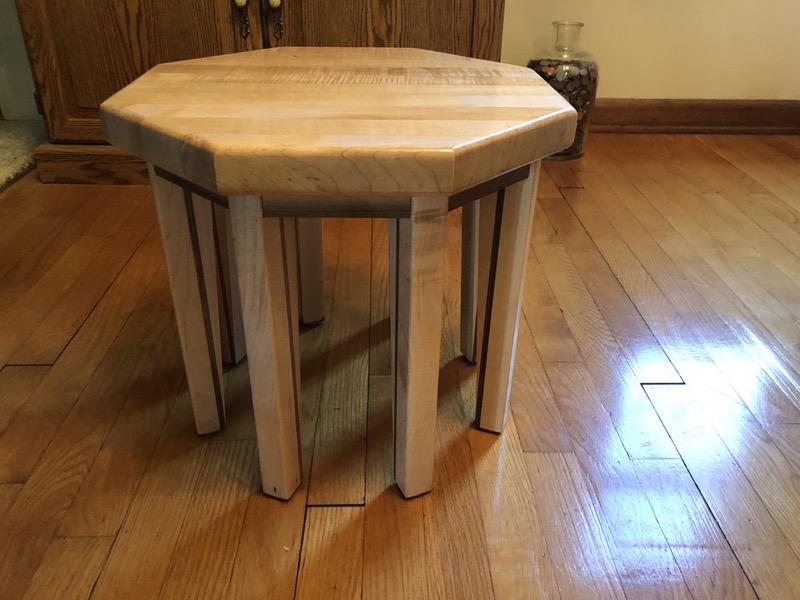
Stool #11 in Maple
October 2024: Has it been 12 years since I made one of these?
I dusted off the jigs and fixtures I had made to build these stools. I was looking for a use for an old cutting board that I found in an abandoned storage unit. This seemed like a good use.
It all turned out pretty nice. I might have chosen different strips of Maple to make the top but it is what it is.
Chet tells me often what a great foot stool it makes for watching TV ( his wife made him a nice pillow to cushin his feet.) It's a good new life for an old cutting board.
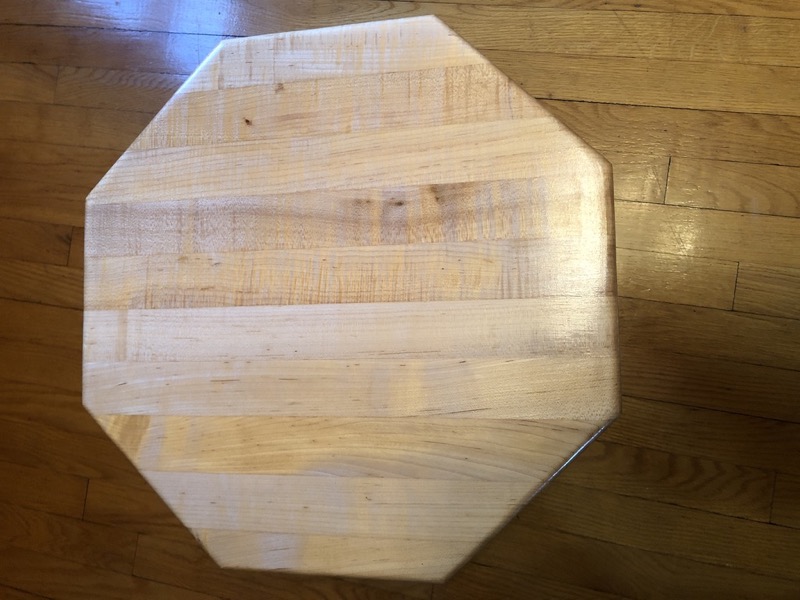
Top View showing cutting board grain
The laminated cutting board top has varied grain and color
This Maple doesn't look very pretty in this picture. It was made for a cutting board, after all. And this image doesn't do it justice.
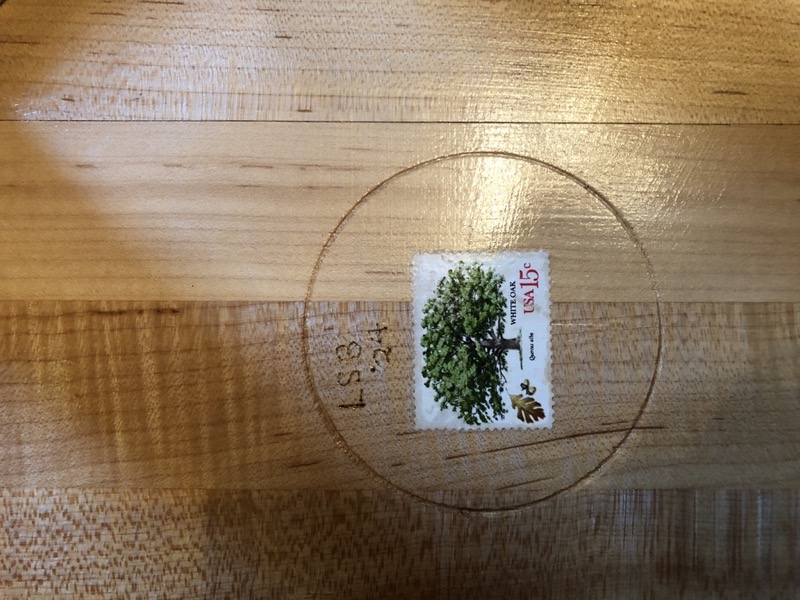
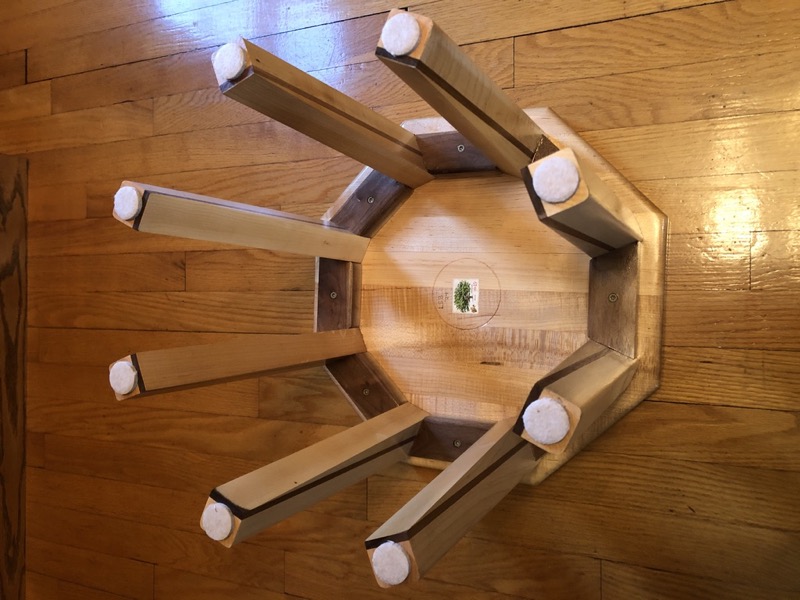
Bottom View
Show details of construction. Also Maple with Black Walnut laminated between.
I haven't worked with Maple before so I don't have any scrap Maple laying around. I was able to get some reject Maple pieces from a furniture factory. They weren't wide enough to make legs so I laminated three pieces together with strips of Black Walnut between. Then I ripped it down the middle at an angle to make two legs.
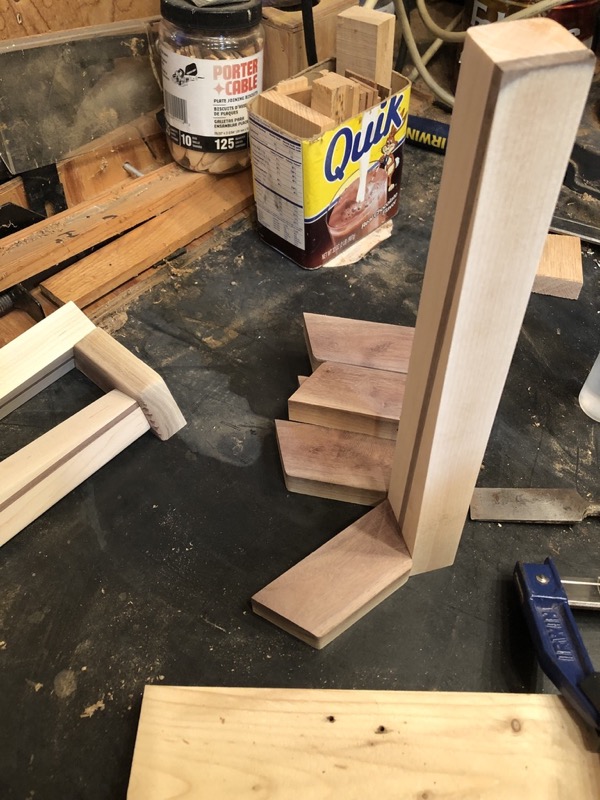
New Techniques and Fixtures used in this assembly
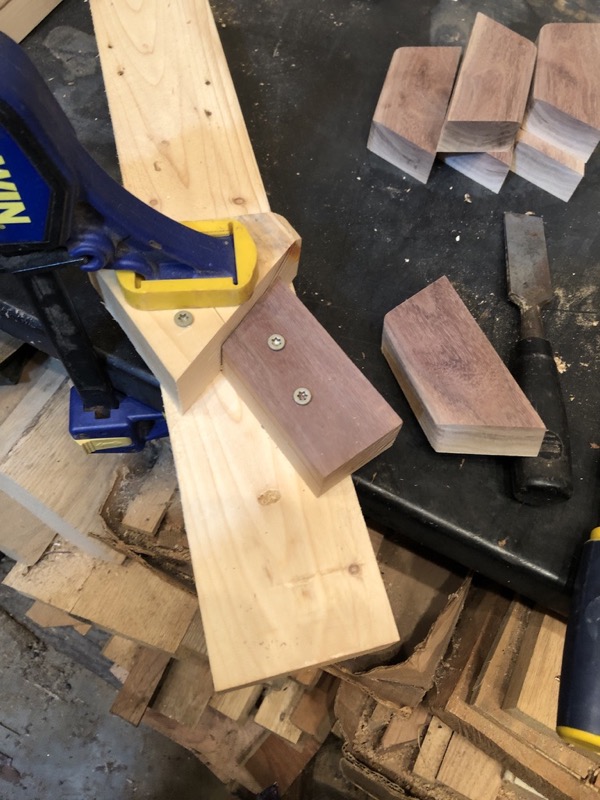
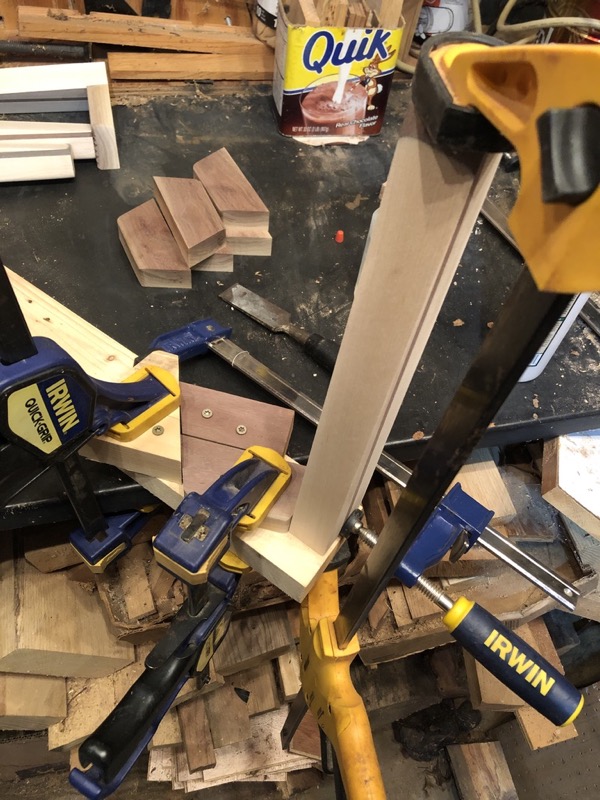
leg glueup
Clamping fixture with leg pieces.
This image is kind of a mess. Click on image to enlarge to get better view.
There are four clamps shown here:
- Clamp fixture to table
- Clamp leg to trapizoid piece
- clamp to hold trapizoid piece to base.
- clamp to hold leg to base
Clamp 3 and 4 are just insurance that the top surfaces of the trapizoid and leg remain flush during clamp.
In previous stools I installed the screws (see below) during the glue process and used those screws instead of clamps to hold the pieces together for gluing. It was very hard to keep everything lined up during this process. So I decided to make it a two-step process -- shown here.
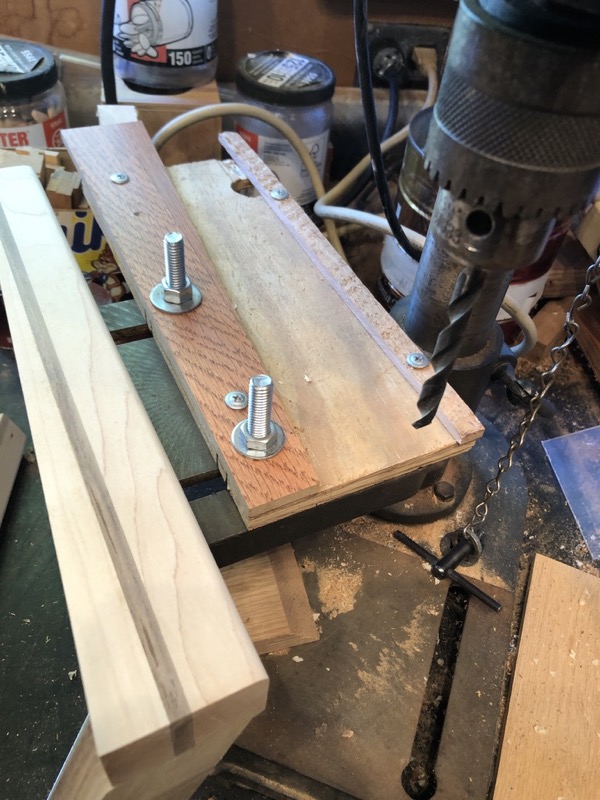
Fixture for drill
Fixture for drilling screw holes to secure leg to trapizoid.
This image is kind of a mess. Click on image to enlarge to get better view.
In previous stools I installed the screws (see below) during the glue process and used those screws instead of clamps to hold the pieces together for gluing. It was very hard to keep everything lined up during this process. So I decided to make it a two-step process -- shown here.
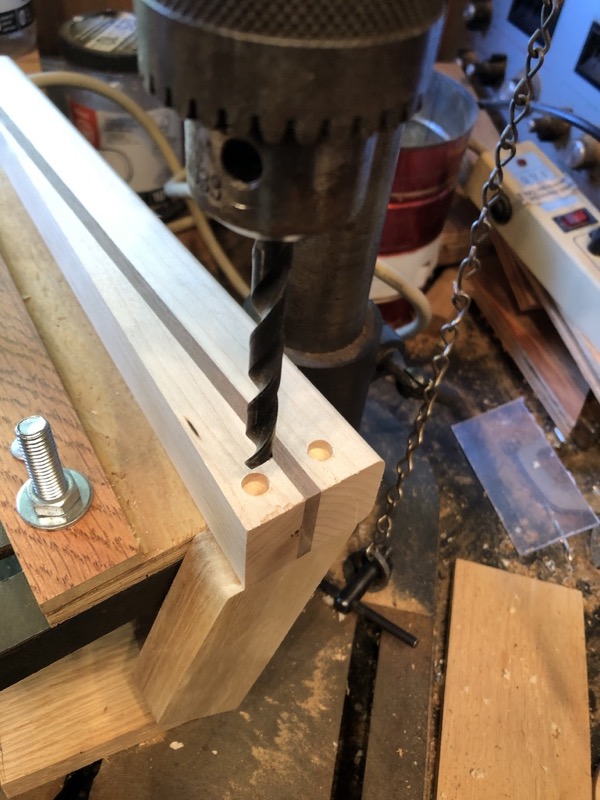
drill left hole
[Left] Hold leg against left side to drill/countersink left hole.
With the trapizoid already glued to the leg, this step is very precise. The leg lays flat on the fixture and the trapizoid butts up against the front edge and hanges down. It's easy to line up the screw hole with the countersink.
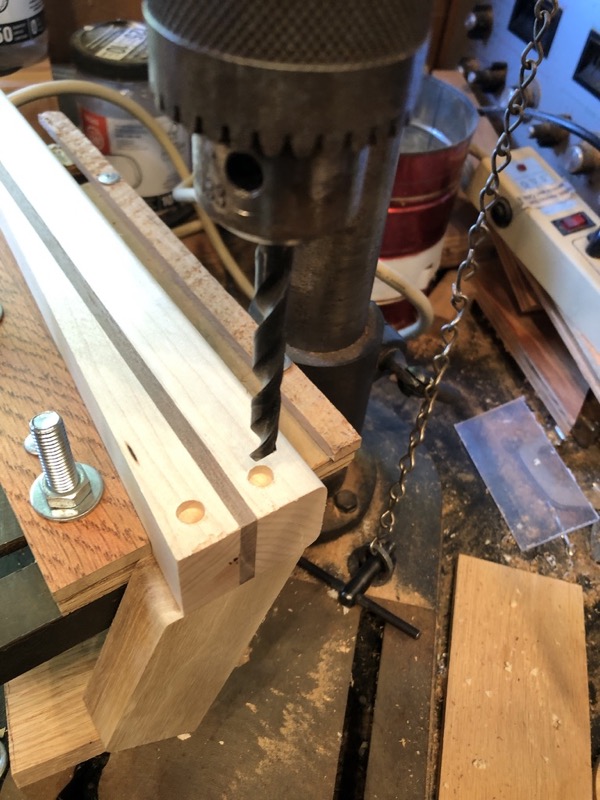
drill right hole
-----------------------------------------------
[Right] Slide leg to right side to drill/countersink right hole.
After countersink is drilled, I replace bit with smaller size to drill pilot hole for screw.
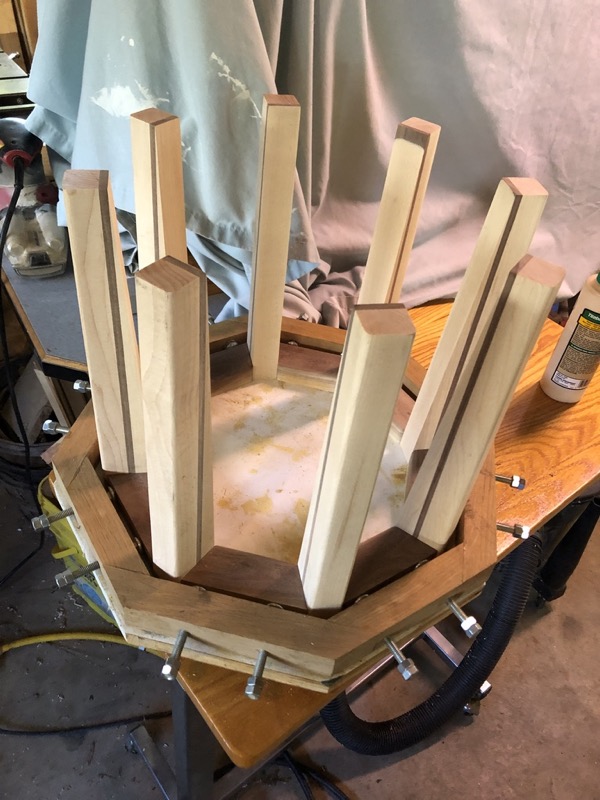
Base Clamping Fixture
Fixture for clamping leg pieces together to form base.
I have used this fixture for most of the stools. It can be adapted to many different size stools with the use of spacers.
This stool is the largest that I have made and it barely fits in the fixture.