Deconstruction: Stage III - Disassembly and salvage of the roof.
Now that the barn (roof) is mostly down on the 'ground' I need to tackle the clean up. This is both a safety concern - lest I get caught in the rubble and are unable to avoid some remaining 'widow maker'. It is also a concern I not cause further damage to the boards and beams that are now 'down' and available for salvage.
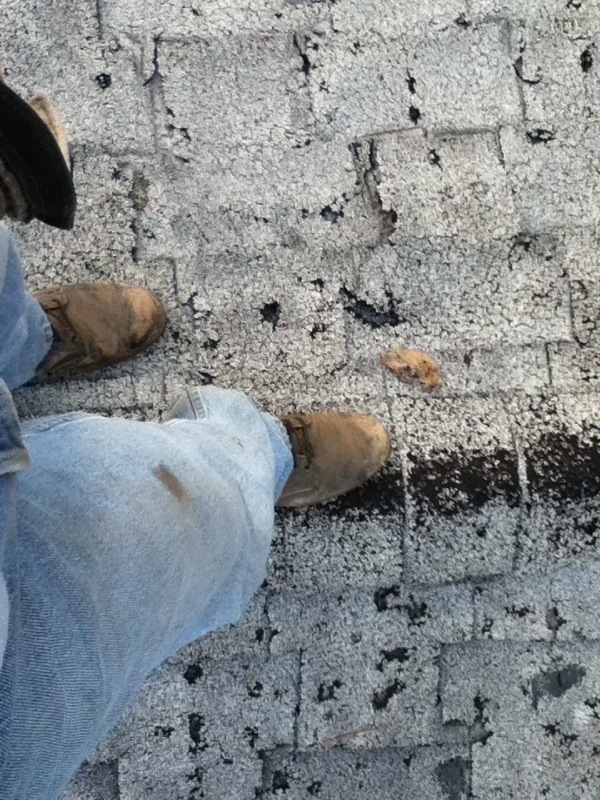
Walking the peak ..
> After more than a decade of envisioning all different scenarios for removing these old shingles, one idea always dominated: how badly do I want to be walking on this old roof 30 feet above the ground.
.. safely on the ground
In many ways the final solution was sad - to the point of tragic - because it meant loosing a lifetime of memories, not to mention the loss of a classic old Wisconsin barn.
BUT now the chance of me loosing my life or becoming seriously injured from working on a rickety roof at an insane height was also lost.
So - I guess I'm good

recycle triage
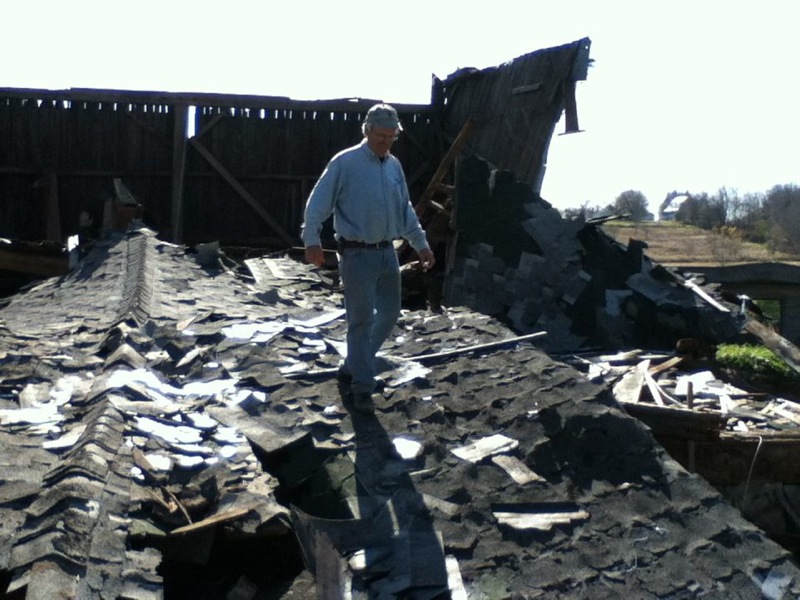
The long process of deconstructing the roof begins. Shingles into one trailer and boards and rafters either saved or discarded based on how badly they are broken up or warped and whether they are rotted.
The roof pretty much came down in sections - or broke into sections when it hit - so I take apart a section and then pull another section to the edge and work on that. This minimized how far I have to carry things and gives us a nice surface to work on (the old haymow floor).

Barn Beams
Many of the 8 X 8 and 6 X 8 and 8 X 10 beams are still in good condition. Most of these are rough-hewn of various species of wood.
I am stacking these outside with stickers to keep them off the ground and to separate each layer for good air circulation. I have talked to many barn de constructor outfits who say they keep just fine when stored in this manner. Still, I'll feel better when I can get them moved into the shed.
Once i have a pile, I cover the whole thing with a section of the old barn door (that is tin sheathed.)
pegged joints
As you see, many of the pegged tenon joints are still intact. This was one of the main reasons the barn was so stubborn about coming down. I would be willing to bet it is one of the reasons the main part of the barn stood up to the tornado in 1952 that removed the roof and siding from one side.

Shingle Mulch
Some of the shingles were spread out in a row over weeds and grass in an area of the new plantation where I have not been able to get tree seedlings established due to the rich soil and thick, persistent, grass that quickly overcomes herbicides, mowing, and plowed furrows as methods of release.
I have re-planted this area three times over the past 10 years and are desperate to find a successful method for grass control.
>I will plant again next spring using these shingles as mulch to keep the weeds away for a little while longer (hopefully).
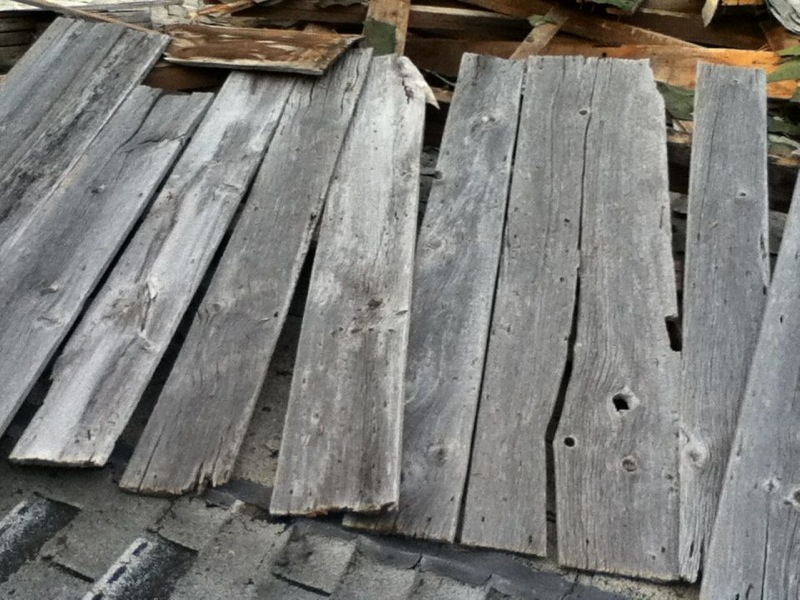
Some bare barn-wood
Much of the siding was not covered with the tin and shows a nice weathering. This wood has never been painted and was on the southern exposure.
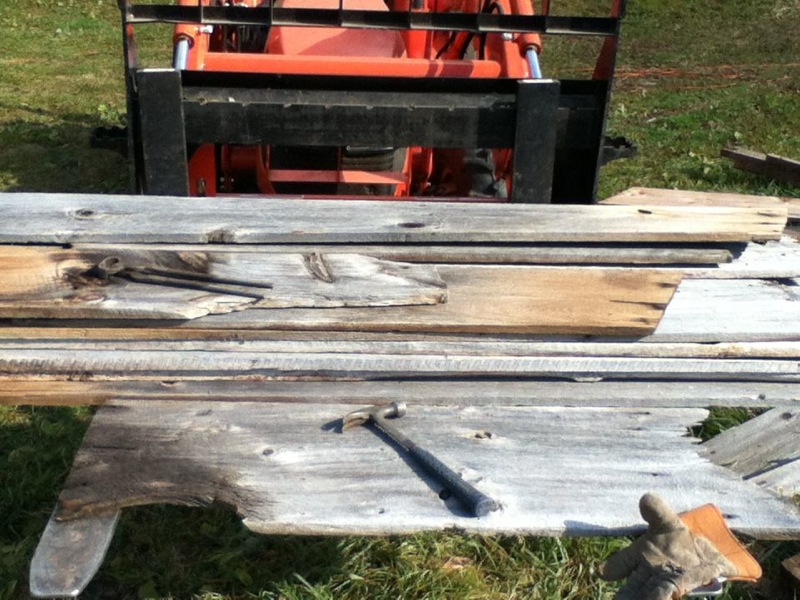
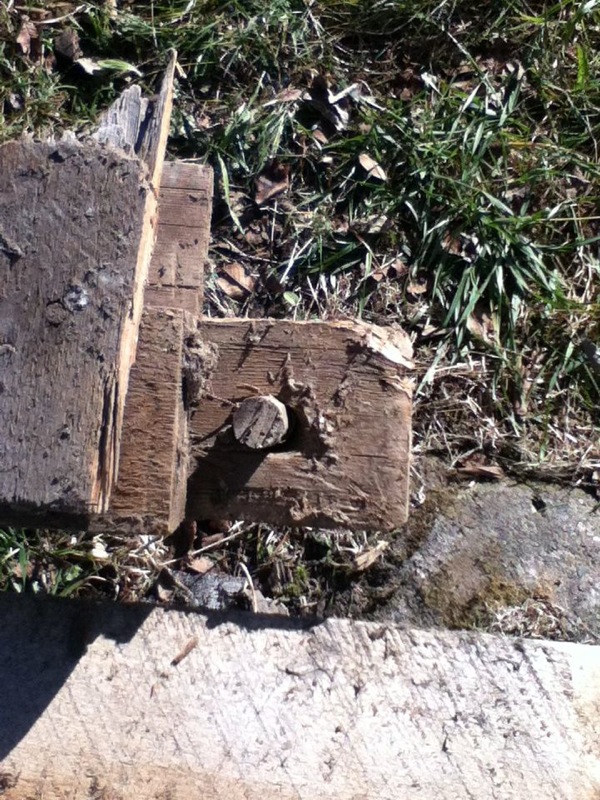
Removing nails
Any barn wood siding that was deemed usable had to be de-nailed. Hopefully this doesn't diminish it's aesthetic appeal.
It is necessary for stacking and handling safety.
Pull down remaining roof.
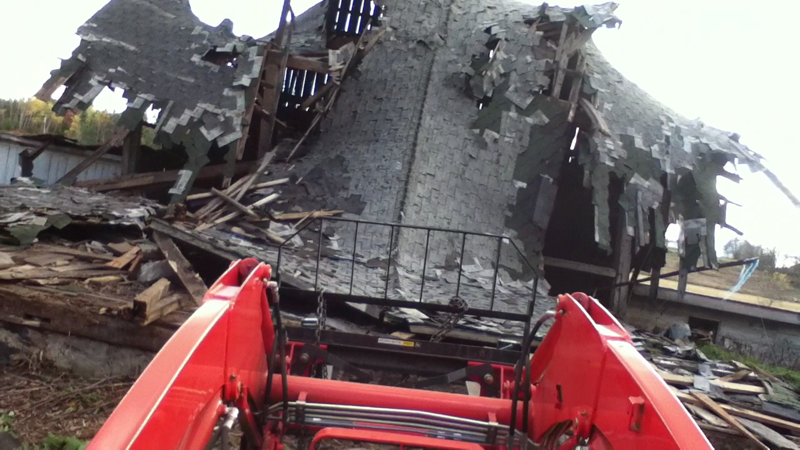
Pull down
Once I had cleaned up as much of the roof that was down I connected chains to the remaining roof section and gave it a pull.
I had been having a lot of trouble with traction during this whole process and finally figured out the cause. I had been attaching the chains to the tractor at the forks so I could lift while I were pulling. After thinking about this for a while I noted how the bucket was attached to the tractor and realized that the connection point was at the very top of the tractor. This created a lever that in effect lifted the rear end (never attach anything high on a tractor when pulling). Once I attached the chain to the bottom front of the tractor I got plenty of traction and the remaining roof was easily pulled down to the deck.
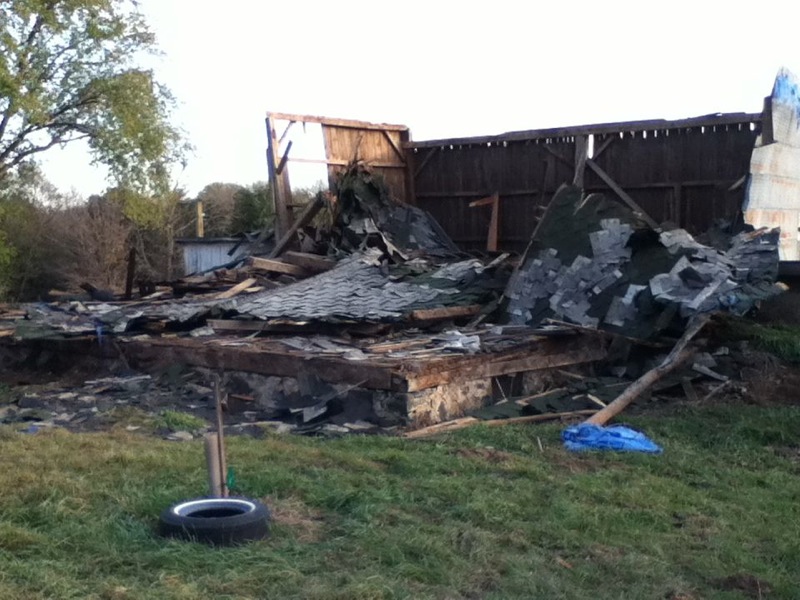
Remaining mess
The roof came down but these three wall sections remained standing.
They seem to be very stable so they will wait until I get the remaining trash from the roof cleaned up before I deal with these walls.
When the roof fell it broke up into sections. The clean up involved pulling a section to the edge of the barn and separating shingles, roof boards, and rafters. This is very time consuming work and reminded me of cleaning up after a bad storm.
I was disappointed in how little salvageable material there was from the actual roof. But as it turned out, the rest of the structure was almost all salvageable.
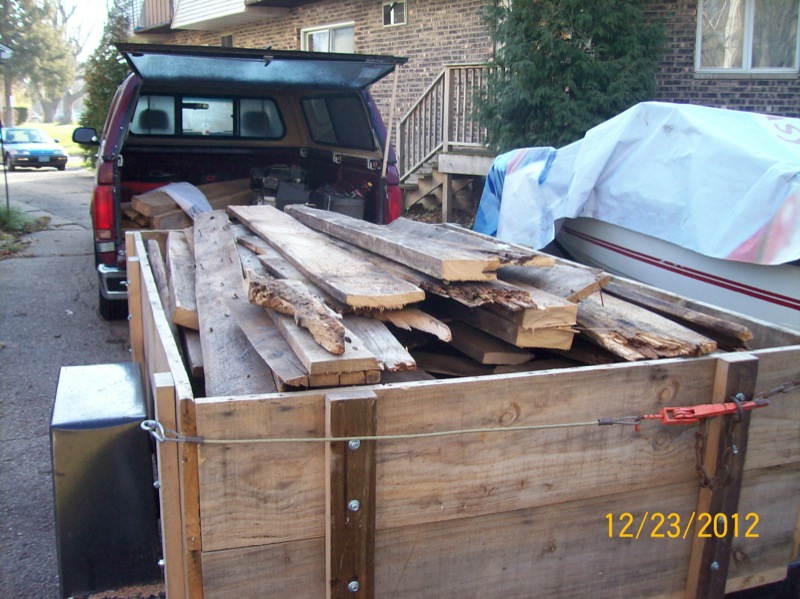
Firewood from barn roof
Another salvage option - firewood
The wood from the old roof was divided into three classes based on condition of the boards and rafters: 1- good enough for re-use; 2 - good enough for firewood; and 3 - good enough for mulch.
I loaded up my trailer with #2 firewood and pulled it back to Madison to help heat our house. I was short on firewood for the winter of 2011 and this filled the shortage nicely. The wood was nearly all hardwood and contained a great deal of heat.
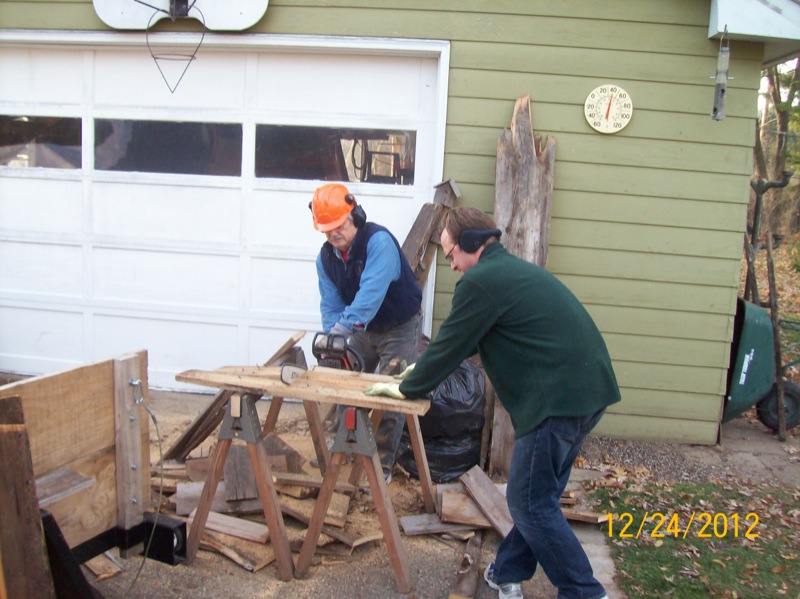
'Processing' firewood
The boards had to be cut into stove size pieces and this seemed to be the most efficient way to do it. We just had to be careful not to hit any nails.
No, I didn't pull any of these nails since our stove doesn't have grates the only consequence is that there is a little added iron in the ashes.

Thanksgiving work crew
Jordan, Lance and I work up an appetite for Thanksgiving dinner.

'Break for winter 2011-2012
Pause in deconstruction.
Work gets put on hold for a winter break. I would have liked to have this farther along at this point but seasons wait for no one.